Making a new artwork!
Chromatic Wave 3
at Susan Hensel Projects
There is a lot that goes into making any artwork. I thought I’d take you behind the scenes again.
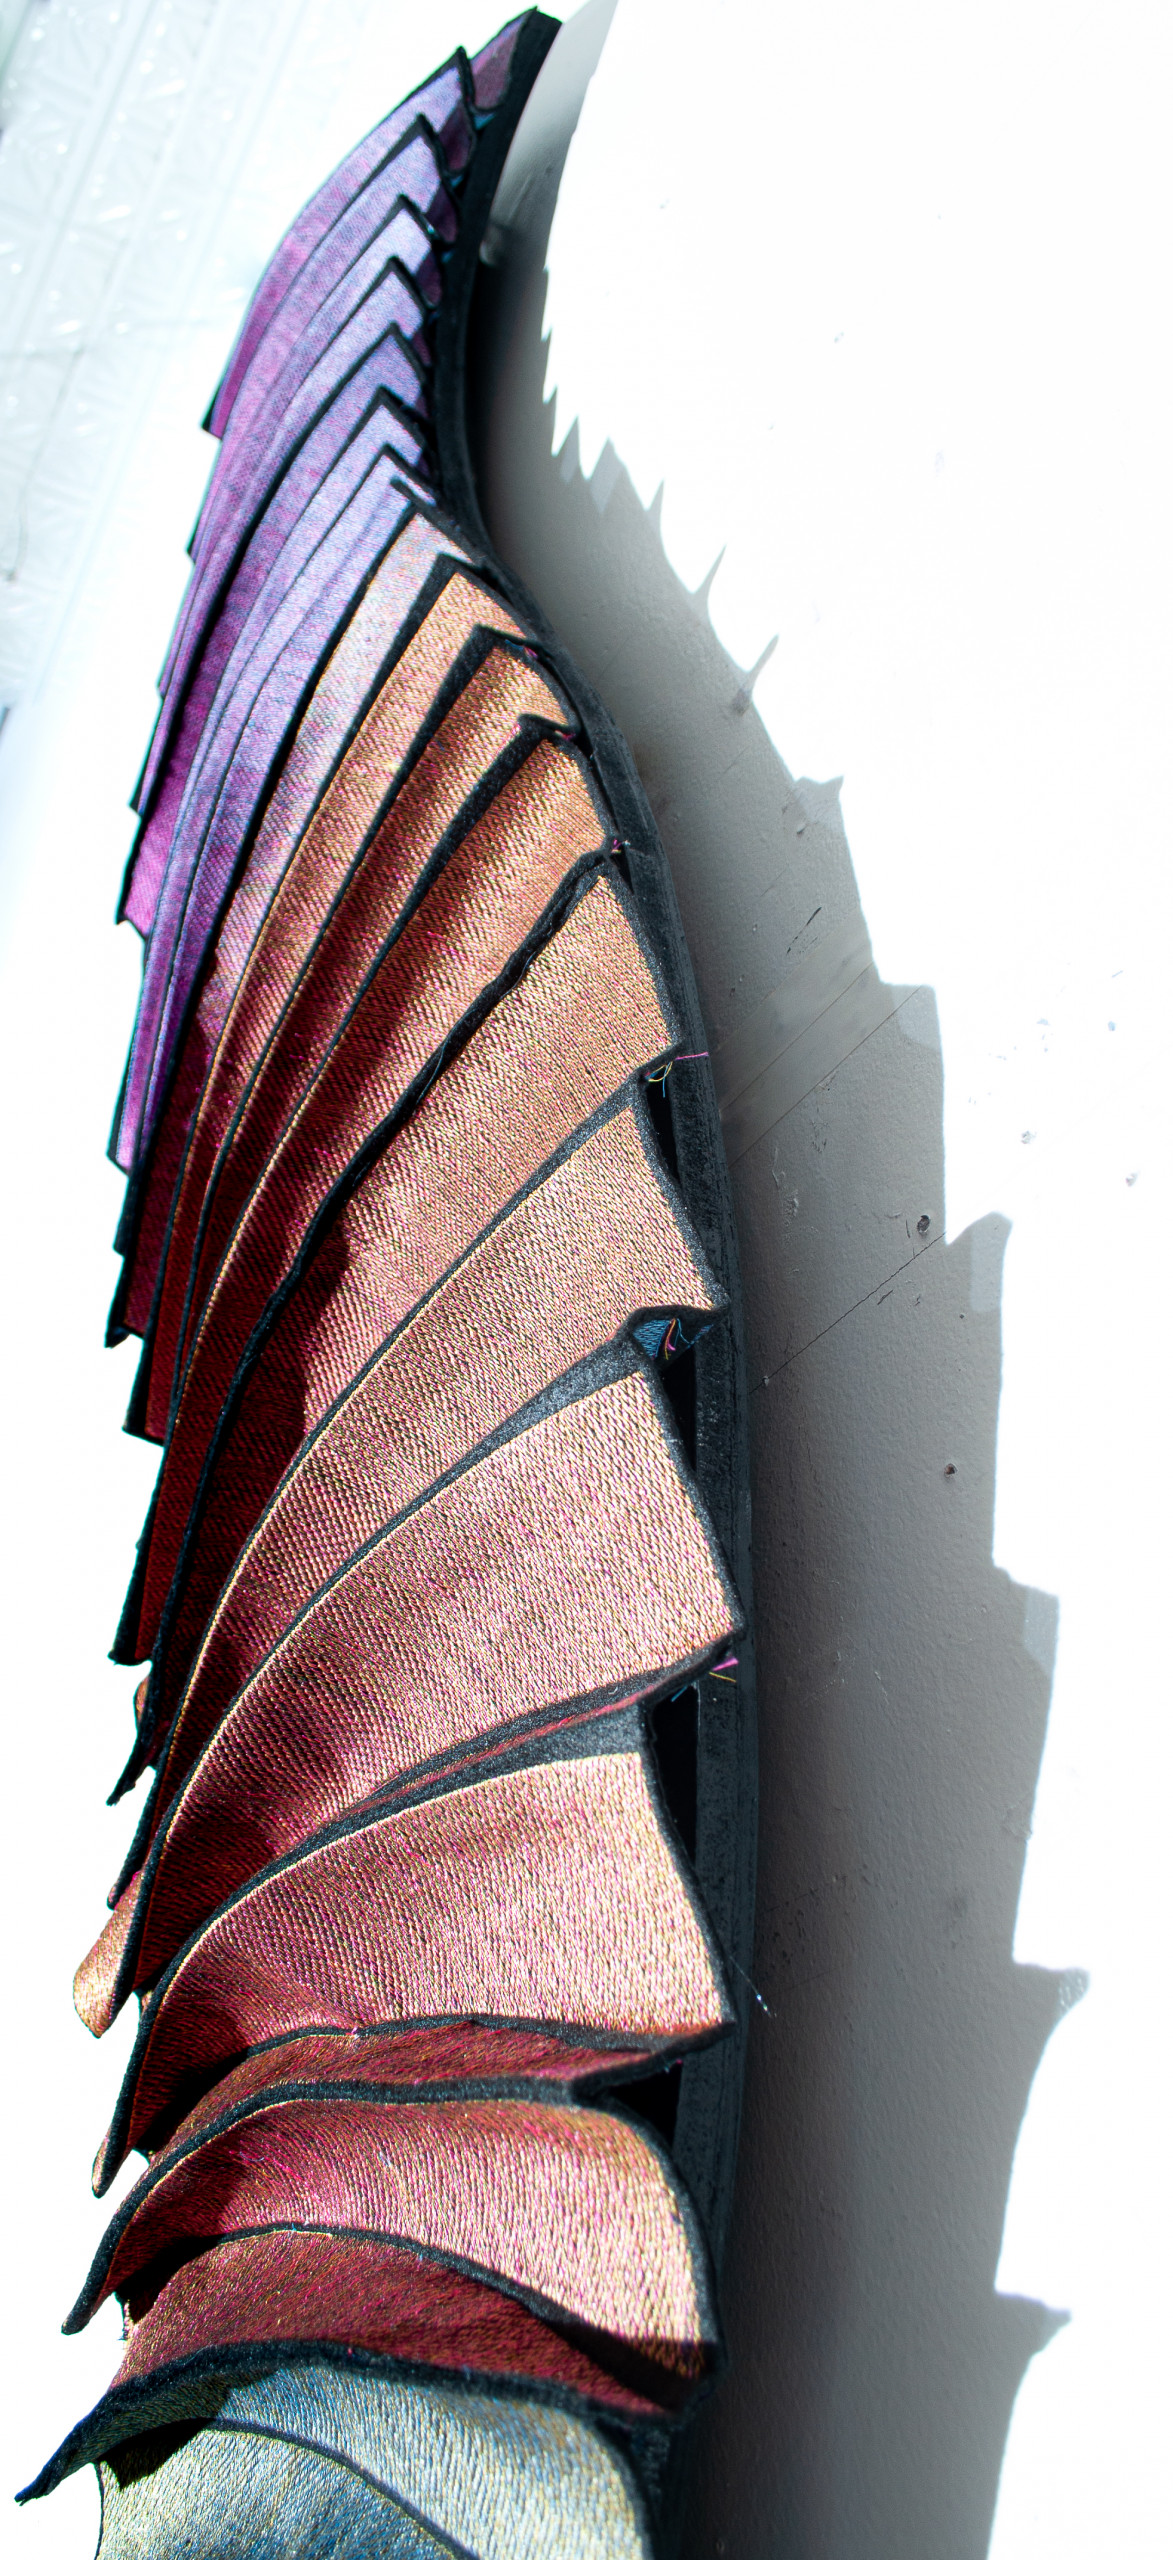
I wanted to see what would happen if I up-sized Chromatic Wave 1,
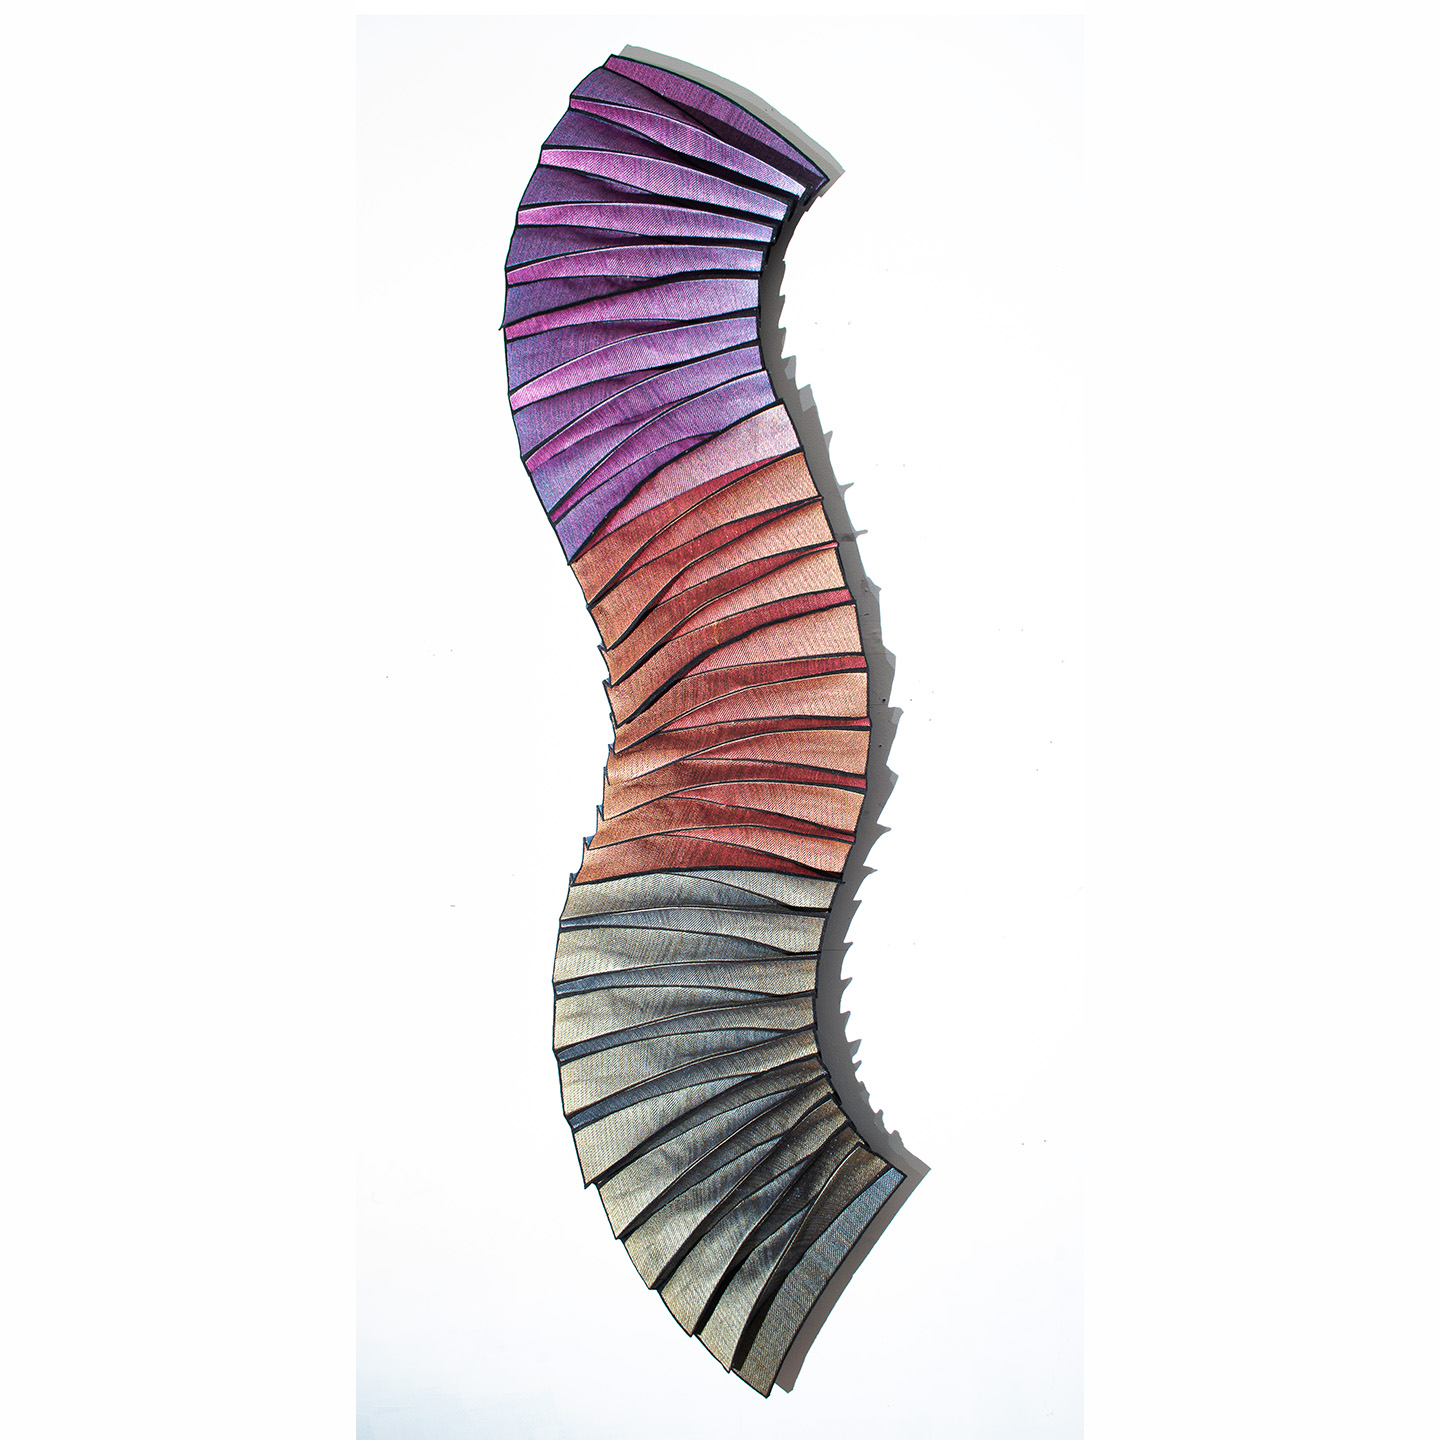 Chromatic Wave 3 was just finished last week.
Chromatic Wave 1 is only 24 ” w. Chromatic Wave 3 is 77″ tall! Architectural in scale.
The digitizing took an afternoon.
The stitching took about two days.
The cutting, sewing and ironing took another day.
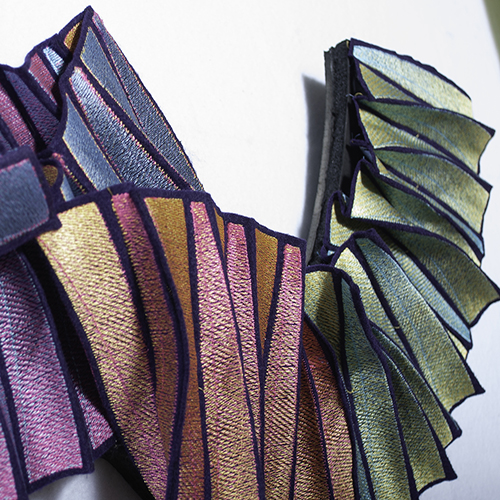
At this scale, movement of the pleats into new forms was limited to the triple curve.
I needed to build an armature to hold it and hang it.
[su_image_carousel source=”media: 10794,10792,10791,10789,10788,10783″ limit=”10″ slides_style=”photo” crop=”none” columns=”5″ captions=”yes” link=”image” target=”self” autoplay=”9″ speed=”slow” image_size=”medium”]
It takes a lot of tools and materials to build these things:
- 1×2 clear pine,
- 1/2″ foam core,
- wood glue and applicators,
- fabric glue,
- gluing pins,
- table saw,
- sabre saw,
- clamps,
- weights for gluing,
- rulers, tape measures,
- a very long table,
- black paint,
- 4″ cleat,
- screws and nails,
- drill,
- nail gun.
I love to build things.
First I had to figure out approximating how long and wide the armature had to be. I wanted the back to be wood so that screws would anchor well. I had to seam both the wood and the foamcore…and those seams had to be staggered, like bricks, for strength. I cut the plywood in 3 pieces and glued it to the foamcore, scattering every possible weight over the surface to get decent contact between the layers. Why foamcore? It is very lightweight and gives me a good surface to pin the embroideries down while the glue dries. When the layers were bonded, I lay the embroidery on the foamcore side and drew around it with a white pencil. I then cut that form out with an electric sabre saw with a fine blade.
[su_image_carousel source=”media: 10787,10786,10785,10784,10783,10782,10781,10780″ limit=”10″ slides_style=”photo” crop=”none” columns=”5″ captions=”yes” link=”image” target=”self” autoplay=”9″ speed=”slow” image_size=”medium”]
I then had to build a long box shaped structure, like a well reinforced canvas stretcher, from the clear pine. This was glued, nailed, clamped and screwed to the back of the armature. Painted black. Installed a cleat. Then I attached the fabric.
And, voilà!
[su_custom_gallery source=”media: 10771,10775,10774,10773,10772″ limit=”7″ link=”lightbox” width=”200″ height=”200″ title=”always”]

